Introduction to AWS with Python and boto3
Amazon Web Services, or AWS for short, is a set of cloud APIs and computational services offered by Amazon. The services range from general server hosting (Elastic Compute Cloud, i.e. EC2) to text messaging services (Simple Notification Service) to face detection APIs (Rekognition)
Contents
- Introduction to AWS with Python and boto3
About this guide
For the purposes of this class, I will have emailed you a URL for logging in, as well as a access key and a secret key, and then a one-time password for the web console.
The first part of this guide is setting up your system so that your AWS keys are saved on your system in such a way that your code will use those keys by default (using the aws configure command). We’ll also install the awscli (AWS command-line interface) and the boto3 Python library.
The second part of this guide will show you how to log into AWS via the web console, though there’s not much reason to do that except to get a high-level view of what we’re doing with the code.
The third part of this guide will run you through some Python examples (with boto3) on using the APIs.
The AWS services that are enabled for this class, so-far, are:
- Rekognition (face-detection) https://boto3.readthedocs.io/en/latest/reference/services/rekognition.html
- Simple Notification Service https://boto3.readthedocs.io/en/latest/reference/services/sns.html
- Polly (text-to-speech) https://boto3.readthedocs.io/en/latest/reference/services/polly.html
Note, there is also the Simple Email Service available to you, but sending email is so complicated than I’m going to skip it for now. Feel free to try it out yourself:
https://boto3.readthedocs.io/en/latest/reference/services/ses.html
Installing the AWS tools
There are 2 Python-AWS-facing libraries that you will need to install, boto3 and awscli:
For boto3, you should be able to install it like this from your command-line:
$ pip install boto3
For awscli, the installation process should be the same if you’re on OS X/Linux:
$ pip install awscli
However, if you are on Windows, you’ll have to install awscli by downloading an installer. The download links can be found here:
You probably want the 64-bit version, which can be directly downloaded here:
https://s3.amazonaws.com/aws-cli/AWSCLI64.msi
More documentation on Boto and AWSCLI
Configuring your AWS environment
AWSCLI is a set of command-line tools for accessing AWS. Really, the main reason why we use it is for easy configuration, as it comes with a subcommand named configure.
After awscli has been installed, you should be able to run the configuration command from your command-line:
$ aws configure
This will take you to an interactive prompt which will ask you for 4 things:
- Your AWS Access Key
- Your AWS Secret Access Key
- A “Default region name” – enter
us-east-1 - A “Default output format” – enter
json
Here’s what the prompt might look like:
$ aws configure
AWS Access Key ID [None]: AKIAIOSFODNN7EXAMPLE
AWS Secret Access Key [None]: wJalrXUtnFEMI/K7MDENG/bPxRfiCYEXAMPLEKEY
Default region name [None]: us-east-1
Default output format [None]: json
If you mis-entered something, just run aws configure again.
What aws configure does
Just to make it obvious that there’s no magic here, what the configure command does is set up a text file that the awscli and boto3`` libraries are configured to look at, by default, for your credentials. If you are on OS X/Linux, the configure command creates a new text file at this path:
~/.aws/credentials
(If you’re on Windows, the location is the same place, except with Windows-style paths)
You can view it using the cat program (or open):
$ cat ~/.aws/credentials
And the file should look like this:
[default]
aws_access_key_id = AKIAIOSFODNN7EXAMPLE
aws_secret_access_key = wJalrXUtnFEMI/K7MDENG/bPxRfiCYEXAMPLEKEY
All that the aws configure tool does is make it so that we don’t have to store these credentials (i.e. our password) to AWS in our actual scripts. In other words, you should never, ever have to do this in a Python script:
MY_AWS_ACCESS_KEY = 'AKIAIOSFODNN7EXAMPLE'

MY_AWS_SECRET_KEY = 'wJalrXUtnFEMI/K7MDENG/bPxRfiCYEXAMPLEKEY'
Some examples of bad developers who put their credentials into actual code files and then saved them online:
Testing your AWS credentials via awscli
For the most part, we won’t be using awscli other than to run the configure subcommand. Although if you know what you’re doing and want to experiment, you’ll see that awscli is just a set of command-line conveniences for doing what we can do in Python, e.g. the way curl is the command-line equivalent of using requests.get('http://www.site.com') in Python.
For now, let’s just do a quick test that your AWS credentials work. By default, if you’re in my class, I’ve allowed your account to have access to several services, including the Simple Notification Service, i.e. sns. Which means you should be able to send a text message to yourself via this command (replace 5558675309 with your own phone number):
$ aws sns publish --phone-number +15558675309 --message 'Hey there'
The command should return some kind of message ID info like this:
{
    "MessageId": "4076648a-d0af-5e37-ae46-35a2056d2fd9"
}
And ideally, your phone should get a text message.
Testing your AWS credentials via boto3
boto3 is the Python library for accessing AWS. To repeat the analogy, boto3 is to awscli as requests is to curl.
If the awscli test of the Simple Notification Service worked for you, here’s its equivalent in Python, which you can run as a script or interactively in iPython:
import boto3

session = boto3.Session(profile_name='default')
sns = session.client('sns')
sns.publish(PhoneNumber='+15558675309', Message='Hello from boto')
The AWS Web console
AWS provides a graphical-user dashboard to its services via web browser. For example, here’s what the interface for testing out SNS looks like for sending a text message:
https://console.aws.amazon.com/sns/v2/home
For the most part, you shouldn’t even have to use the web console unless you’re using the interactive demos. Everything you can do in the web console, you can do in code, and preferably so. But sometimes it’s fun to push buttons and see things work. And the dashboard provides a kind of visual overview of all the factors and variables available for each service.
Logging into the AWS web console
You should have received a login URL, a login username (likely the same email as your Stanford email address, for convenience sake), and a one-time password that you can change to something else once successfully logging in.
Here’s the URL to login to AWS for this class:
https://412700679933.signin.aws.amazon.com/console
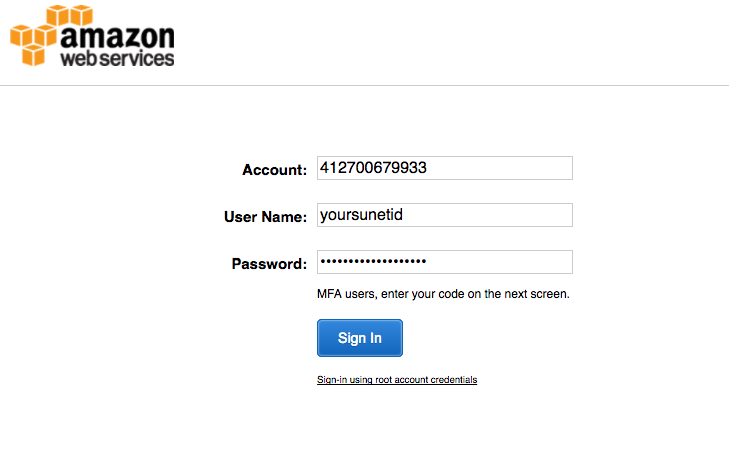
After successfully logging in, you should be able to just bookmark this URL:
API demos via the console
Rekognition object/scene detection demo <https://console.aws.amazon.com/rekognition/home?region=us-east-1#/label-detection>_:
(aka detect_labels)
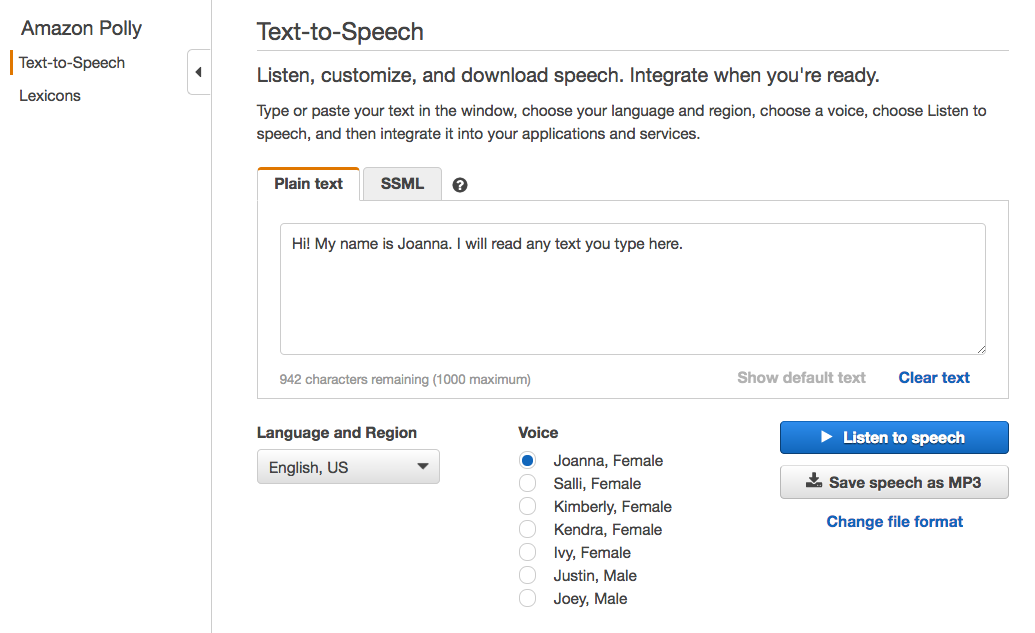
Polly speech synthesizer demo:
https://console.aws.amazon.com/polly/home/SynthesizeSpeech
Simple Notification Service demo:
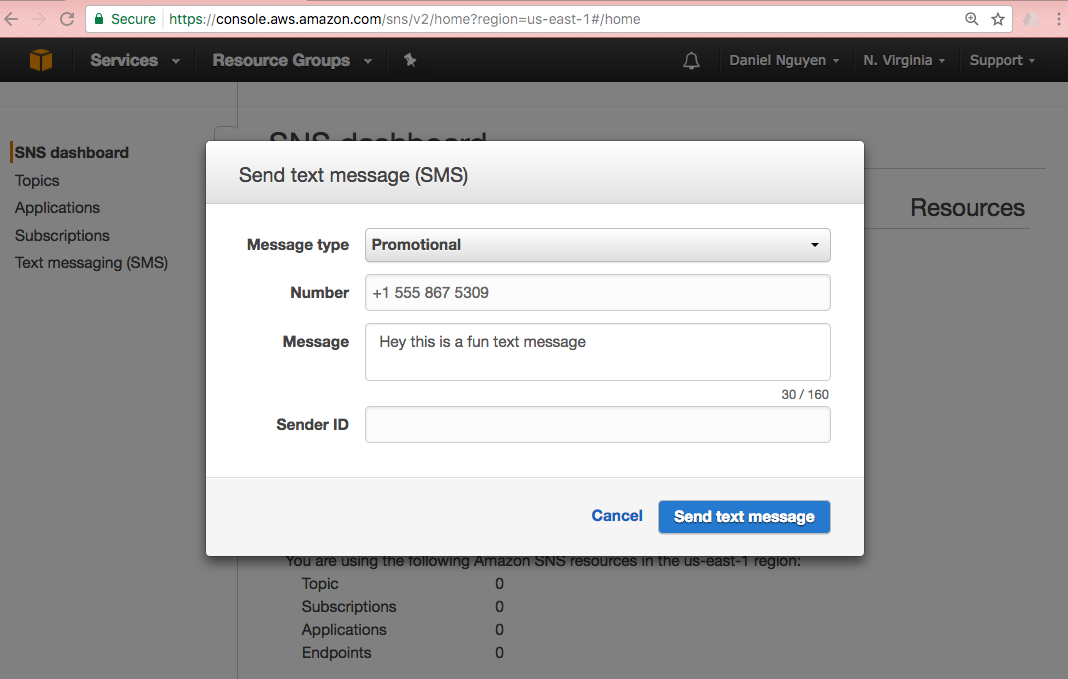
https://console.aws.amazon.com/sns/v2/home
Click the Publish Text Message option, which will bring up a modal that looks like this:
You can pick either “Promotional” or “Transactional” as the Message type. And you shouldn’t have to fill out the Sender ID field.
Writing Python to interact with AWS
After you’ve gotten acquainted with what the AWS APIs do, let’s try to access them via Python and boto3, which is the Python library Amazon has provided to make it easier to write AWS-facing Python code.
Basics to know about boto3 and Python
The full documentation for boto3 is here:
http://boto3.readthedocs.io/en/latest/
For the purposes of this lesson, I’m just going to tell you what methods and steps to follow, as the documentation is quite dense. As strange as the following code snippets will seem, it is still all plain Python syntax, just using variable/function names as provided by the boto3 library.
That said, the boto3 library is designed in such a way that it emphasizes certain facets about plain Python that we haven’t really focused on. Here are the main things that might look confusing to you:
Named arguments for functions/methods
Recall how to design a basic Python function that has arguments. The following foo function has two arguments:
def foo(salutation, name):
    return "{}, {}".format(salutation, name)
And this is how we call foo:
>>> foo('hello', 'dan')
hello, dan
We can also call the arguments out-of-order, as long as we include their names:
>>> foo('dan', 'hello')
dan, hello
>>> foo(name='dan', salutation='hello')
hello, dan
By and large, most of the boto3 functions require you to include the name of the argument. For example, here’s a method that sends a text message via SNS:
sns.publish(PhoneNumber='+15558675309', Message="hello")
Whereas this will throw an error:
sns.publish('+15558675309', "hello")
Responses as dictionaries
Everytime we make a request to the Amazon AWS APIs, we get a response that comes in the form of a dictionary.
For example, here is some example metadata when publishing a text message via SNS:
>>> resp = sns.publish(PhoneNumber='+15558675309', Message="hello")
>>> type(resp)
dict
>>> resp.keys()
dict_keys(['MessageId', 'ResponseMetadata'])
>>> resp
{'MessageId': '9b08345a-a01z-1234-1234-1234567ef20g',
'ResponseMetadata': {'HTTPHeaders': {'content-length': '294',
  'content-type': 'text/xml',
  'date': 'Tue, 23 Feb 2017 06:59:11 GMT',
  'x-amzn-requestid': '9b08345a-a01z-1234-1234-1234567ef20g'},
 'HTTPStatusCode': 200,
 'RequestId': '9b08345a-a01z-1234-1234-1234567ef20g',
 'RetryAttempts': 0}}
Typically, every AWS API response dictionary has a 'ResponseMetadata' key, and then another key specific to that response. And each of these top-level keys point to a dictionary.
Improper Python naming conventions
So AWS is a great service because Amazon itself uses AWS to run, well, Amazon.com, among other things. However, the service wasn’t originally written in Python, which means among other things, it has different conventions for how things are named.
In Python, whereas the general convention is to use snake case, i.e. lowercase and underscore for naming variables, most of the variables/argument names as referred to in boto3 are capitalized and camel case.
In other words, the boto3 library expects arguments like these PhoneNumber and Message:
sns.publish(PhoneNumber='+15558675309', Message="hello")
And not like these: phone_number and message:
sns.publish(phone_number='+15558675309', message="hello")
Again, naming things is arbitrary. But in this case, with the functions/methods defined by Amazon (and whoever created the boto3 library), we just go with what the documentation says.
As always, you should be testing out code in the interactive shell (i.e. ipython) and using the help() function to get quick definitions of functions and objects:
>>> import boto3
>>> help(boto3.Session)
>>> session = boto3.Session(profile_name='default')
>>> help(session)
>>> help(session.client)
>>> sns_client = session.client('sns')
>>> help(sns_client.publish)
Getting started with boto3
Now let’s go over the basic steps of instantiating a AWS session (i.e. “logging in”) and then accessing a service.
Instantiating a AWS session
After importing the library, we want to create a Session object:
import boto3
session = boto3.Session(profile_name='default')
What does that 'default' mean?
Remember when we used aws configure to create a credentials file in ~/.aws/credentials that looked something like this:
[default]
aws_access_key_id = AKIAIOSFODNN7EXAMPLE
aws_secret_access_key = wJalrXUtnFEMI/K7MDENG/bPxRfiCYEXAMPLEKEY
Specifying the profile argument in boto3.Session() is how we “log in” using the credentials listed under [default]. Actually, you may be able to get away with this:
import boto3
session = boto3.Session()
– specifying profile is only necessary if you, like me, have several Amazon/AWS accounts, which you probably don’t at this point. But I’ll be using this convention in all of my example code:
session = boto3.Session(profile_name='default')
Connecting to a AWS service
AWS, as you know by now, is a collection of services. After creating a “session”, we use the session object’s client method to specify which service we want to use. Each service has its own name – here are the ones relevant to us:
# Simple notification service
sns = session.client('sns')

# Rekognition image/computer-vision
rekog = session.client('rekognition')

# Polly text-to-speech
polly = session.client('polly')
To reiterate the Python basics, in some of the official documentation for the boto3 library, you’ll see this convention:
client = session.client('polly')
I like using the noun for a service client as a matter of style. Use what feels comfortable to you.
Examples of boto3 client code
Now that we know the basics of boto3 and AWS, here are some example scripts that actually do something.
Examples of boto3 and Simple Notification Service
SNS is used to send text messages, or other kinds of messages. For this class, we’ll only care about text messages unless you know how to build your own iOS/Android app to use their push notification services.
- Pricing: https://aws.amazon.com/sns/pricing/
- Boto3 docs: https://boto3.readthedocs.io/en/latest/reference/services/sns.html
- Console demo: https://console.aws.amazon.com/sns/v2/home
Instantiating the client
import boto3
session = boto3.Session(profile_name='default')
sns = session.client('sns')
Sending a text message
Use the publish method:
https://boto3.readthedocs.io/en/latest/reference/services/sns.html#SNS.Client.publish
resp = sns.publish(PhoneNumber='+15557779999', Message='Some message')
The publish method, like most client methods, returns a dictionary. The resp variable will point to an object that looks like this:
{'MessageId': '9b08345a-a01z-1234-1234-1234567ef20g',
 'ResponseMetadata': {'HTTPHeaders': {'content-length': '294',
   'content-type': 'text/xml',
   'date': 'Tue, 23 Feb 2017 06:59:11 GMT',
   'x-amzn-requestid': '9b08345a-a01z-1234-1234-1234567ef20g'},
  'HTTPStatusCode': 200,
  'RequestId': '9b08345a-a01z-1234-1234-1234567ef20g',
  'RetryAttempts': 0}}
Note: Sending text messages can be expensive. Currently, the price is $0.00645 per message in the United States: https://aws.amazon.com/sns/sms-pricing/
Or, 6 cents for every 10 messages. Multiplied across the class, that can add up. So please do not send messages unless you need to.
Examples of boto3 and Polly
The general use-case of Polly is to send a text string and get the bytes of a MP3 or WAV file. For the most part, we’ll want to write those bytes to disk, and then open up that file to listen to it.
- Pricing: https://aws.amazon.com/polly/pricing/
- Boto3 docs: https://boto3.readthedocs.io/en/latest/reference/services/polly.html
- Console demo: https://console.aws.amazon.com/polly/home/SynthesizeSpeech
Instantiating a client
import boto3
session = boto3.Session(profile_name='default')
polly = session.client('polly')
Getting a list of available voices
The describe_voices method returns a dictionary. The Voices key points to a list of dictionary objects, one for each voice:
>>> resp = polly.describe_voices()
>>> resp.keys()
dict_keys(['ResponseMetadata', 'Voices'])
>>> voices = resp['Voices']
>>> len(voices)
47    # may change/increase, obviously, as Amazon adds more voices
>>> voices[0]
{'Gender': 'Female',
 'Id': 'Joanna',
 'LanguageCode': 'en-US',
 'LanguageName': 'US English',
 'Name': 'Joanna'}
>>> voices[5]
{'Gender': 'Female',
 'Id': 'Tatyana',
 'LanguageCode': 'ru-RU',
 'LanguageName': 'Russian',
 'Name': 'Tatyana'}
Getting a list of all voices that are in English
eng_voices = []
resp = polly.describe_voices()
voices = resp['Voices']
for v in voices:
    if 'English' in v['LanguageName']:
        eng_voices.append(v)
Or, if you’re into list comprehensions:
resp = polly.describe_voices()
eng_voices = [v for v in voices if 'English' in v['LanguageName']]
Getting “Hello world” as an MP3 spoken in the voice of ‘Russell’
Use the synthesize_speech method, which requires the following 3 named arguments:
- OutputFormat
- Text
- VoiceId
http://boto3.readthedocs.io/en/latest/reference/services/polly.html#synthesize_speech
Here’s the request:
resp = polly.synthesize_speech(OutputFormat='mp3',
        Text='Hello world',
        VoiceId='Russell')
The response from AWS is, again, a dictionary. And if successful, it should have an 'AudioStream' key which is a series of bytes. If we want to listen to these bytes, the easiest way is to save it as a file and then open that file in a MP3 player. Here’s the verbose, basic way:
thebytes = resp['AudioStream'].read()
thefile = open('pollysample.mp3', 'wb')
thefile.write(thebytes)
thefile.close()
Or, if you like being minimalist and Pythonic:
with open('pollysample.mp3', 'wb') as f:
    f.write(resp['AudioStream'].read())
Examples of boto3 and Rekognition
The general use-case of Polly is to send a text string and get the bytes of a MP3 or WAV file. For the most part, we’ll want to write those bytes to disk, and then open up that file to listen to it.
- Pricing: https://aws.amazon.com/rekognition/pricing/
- Boto3 docs: https://boto3.readthedocs.io/en/latest/reference/services/rekognition.html
- Console demo: https://console.aws.amazon.com/rekognition/v2/home
Instantiating a client
import boto3
session = boto3.Session(profile_name='default')
rek = session.client('rekognition')
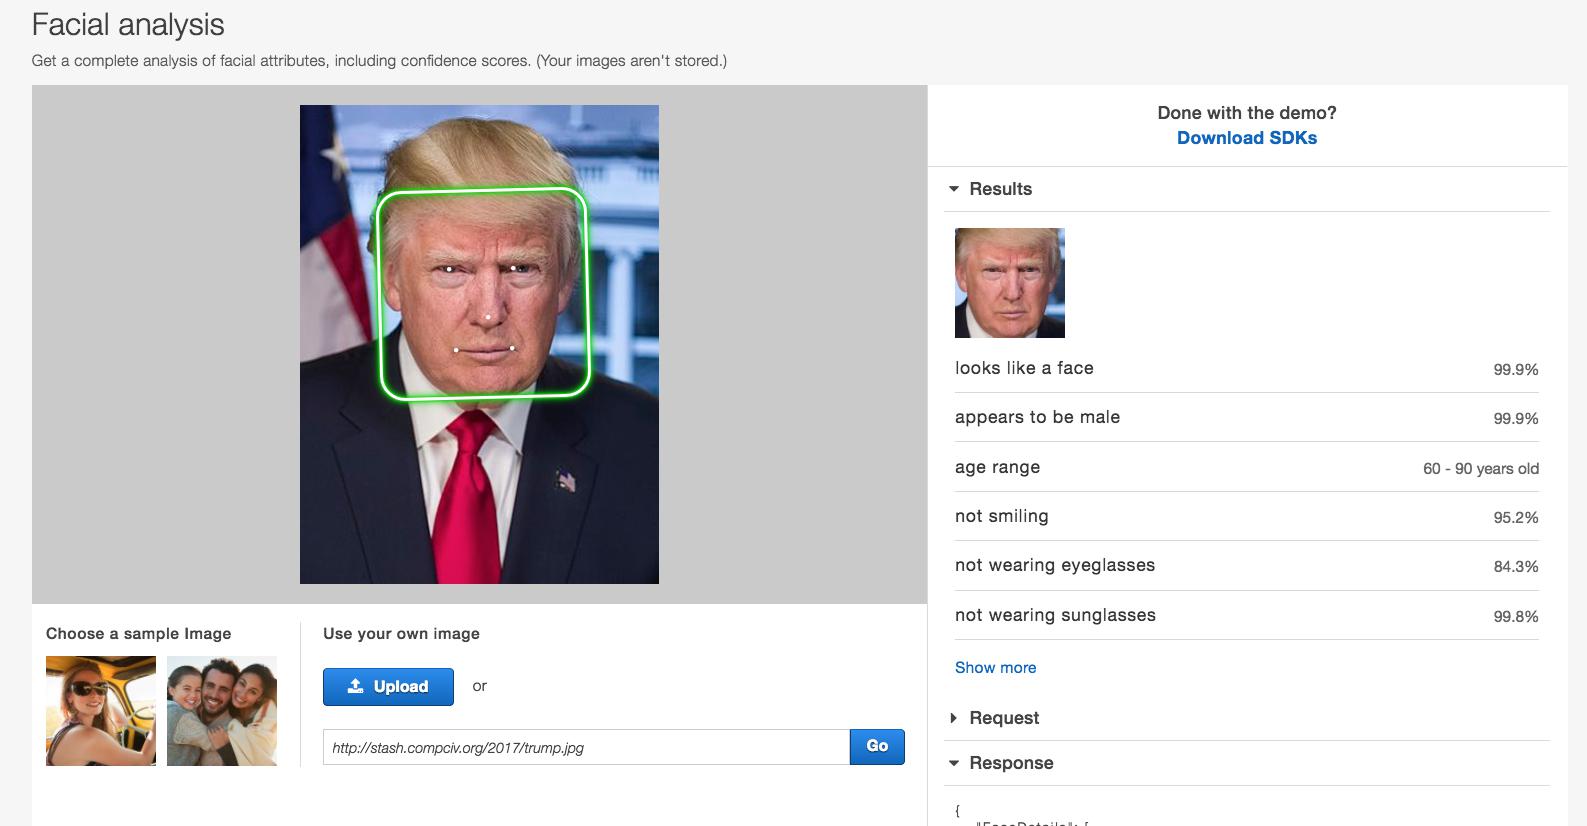
Uploading a local image and getting a response from Rekognition face-detect endpoint
Assuming you have a file relative to your code named trump.jpg, open it as any other file but in 'rb' mode, i.e. “read bytes”.
Then call the Rekognition client’s detect_faces method:
(It’s worth looking at the definition of detect_faces to see why the following snippet seems to contain superfluous arguments. The answer? It’s just what Amazon tells us to include)
imgfile = open('trump.jpg', 'rb')
imgbytes = imgfile.read()
imgfile.close()

imgobj = {'Bytes': imgbytes}
imgattrs = ['ALL']

rekresp = rek.detect_faces(Image=imgobj, Attributes=imgattrs)
Or, if you prefer something less verbose:
with open('trump.jpg', 'rb') as f:
    imgbytes = f.read()

rekresp = rek.detect_faces(Image={'Bytes': imgbytes}, Attributes=['ALL'])
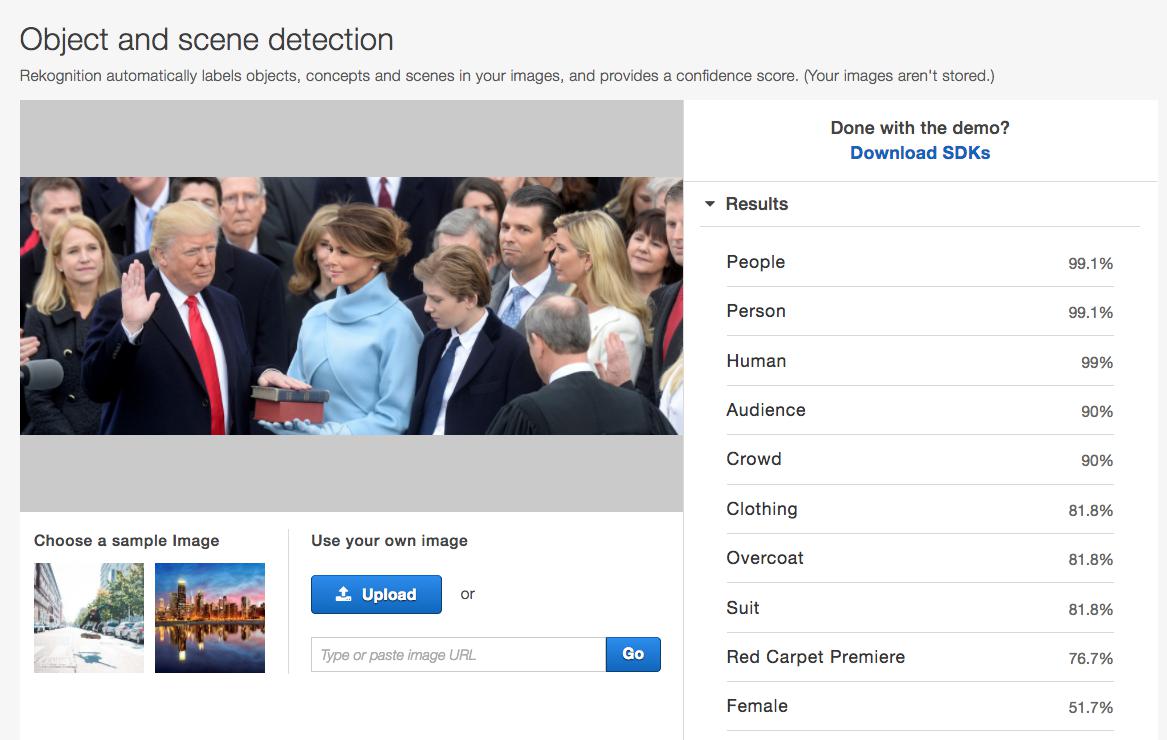
Uploading a local image to Rekognize’s object detection API
Use the detect_labels method:
with open('trump.jpg', 'rb') as f:
    imgbytes = f.read()

rekresp = rek.detect_labels(Image={'Bytes': imgbytes})
Given a URL, pass the image into Rekognize’s API
This has nothing to do with the Rekognize API itself, but an implicit understanding of what “bytes” are, and what downloading a file is.
In other words, this is just another application of the requests library, combined with the boto3 library, to create a function that makes it easy to pass the contents of a URL straight into the Rekognize API – as opposed to having to have a file saved on your hard drive before uploading it to the API:
import requests
import boto3

session = boto3.Session(profile_name='default')
rek = session.client('rekognition')

resp = requests.get('http://stash.compciv.org/2017/obama.jpg')
imgbytes = resp.content

rekresp = rek.detect_faces(Image={'Bytes': imgbytes},
                           Attributes=['ALL'])